
Difficulty
Easy
Steps
4
Time Required
00:10:00 - 00:20:00

In Progress
This guide is currently being written. Reload periodically to see the latest changes.
Quiz
0
Tools
Parts
No parts specified.
-
-
This guide is for dis-assembly of all Hot Rod and Blues Series Fender amps. Including all versions of the following.
-
Blues Deluxe
-
Blues Deville
-
Hot Rod Deluxe
-
Hot Rod Deville
-
Blues Junior Jr.
-
Pro Junior Jr.
-
-
-
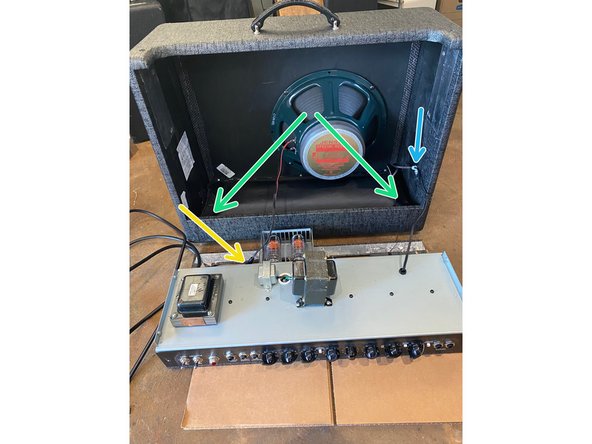
Remove the 6 screws holding the chassis, 2 on each side and 2 on the top
-
The screws indicated by the orange arrows are not visible in this picture but they need to come out as well.
-
-
-
Stand the amp back up and your amp should look something like this.
-
Unplug the speaker
-
Remove strain relief (some amps may also have a strain relief for the power cord.)
-
Remove screws holding the bag for the reverb tank and unplug the tank.
-
It's not a bad idea to mark where the red and black leads connect to the tank.
-
-
-
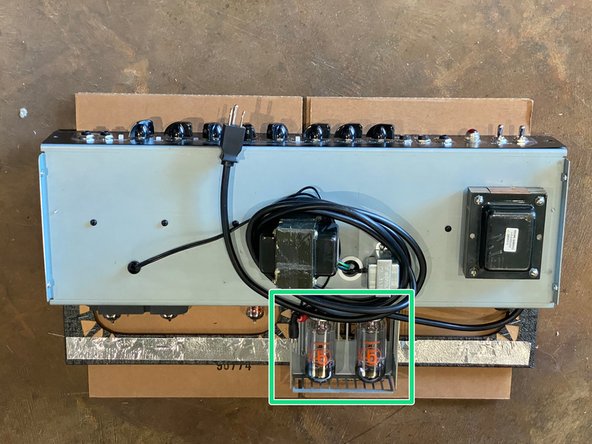
The Chassis is now FREE and ready for the following:
-
Pack and Send in your amp for service, if there is not a cage around your power tubes please remove the tubes and bubble wrap them separately..
-
Proceed to modding your amp including replacement of a transformer or speaker.
-

This guide is for the dis-assembly of Hot Rod and Blues Series amps. This guide is for preparing your amp to send in for service or modifying your amp. Most kits can be installed without removing the chassis but we recommend removal for ease of installation of the kit.
This guide is for the dis-assembly of Hot Rod and Blues Series amps. This guide is for preparing your amp to send in for service or modifying your amp. Most kits can be installed without removing the chassis but we recommend removal for ease of installation of the kit.
Cancel: I did not complete this guide.
One other person completed this guide.
